A Clean, Multipurpose Agency Theme


Applying presets to portraits
I recently had a quick shoot to on the shore of lake Windermere originally the shoot was to demostraight the use of flashguns but the overcast day was giving such a soft ambient light I decided to take advantage of that. I used a ND filter to allow a very narrow DOF I wanted to have the background out of focus yet keep the detail within the subject.
I wanted to edit these images in a way I have not tried before, by using the preset to add to the subject matter, this is a method I have noticed a lot of photographers I follow on photoshop use. A lot of the preset are actually designed to replicate old film styles, this method of editing could be seen as a throw back to how photographer selected film for a shoot just applied after the shoot not before
I wanted to keep the style of my subject while showing off the environment he was in, to do this I started with shooting with a narrow DOF this would lead the eye to the subject emphasising the detail within his beard and clothing. To emphasis this while editing I was looking of a preset to show the most detail with the blacks and shadows. as well as bumping up the clarity.
To show off the environment I wanted the tones to reflect the area and the day, the wasted out tones give its a classic with the dull highlights reflecting the overcast feeling of the day. I also cropped some images to focus on details of the environment, buy removing the subjects face it requires you to look else where in this case you notice the rhythmic waves juxtaposed with the liner wood pier.

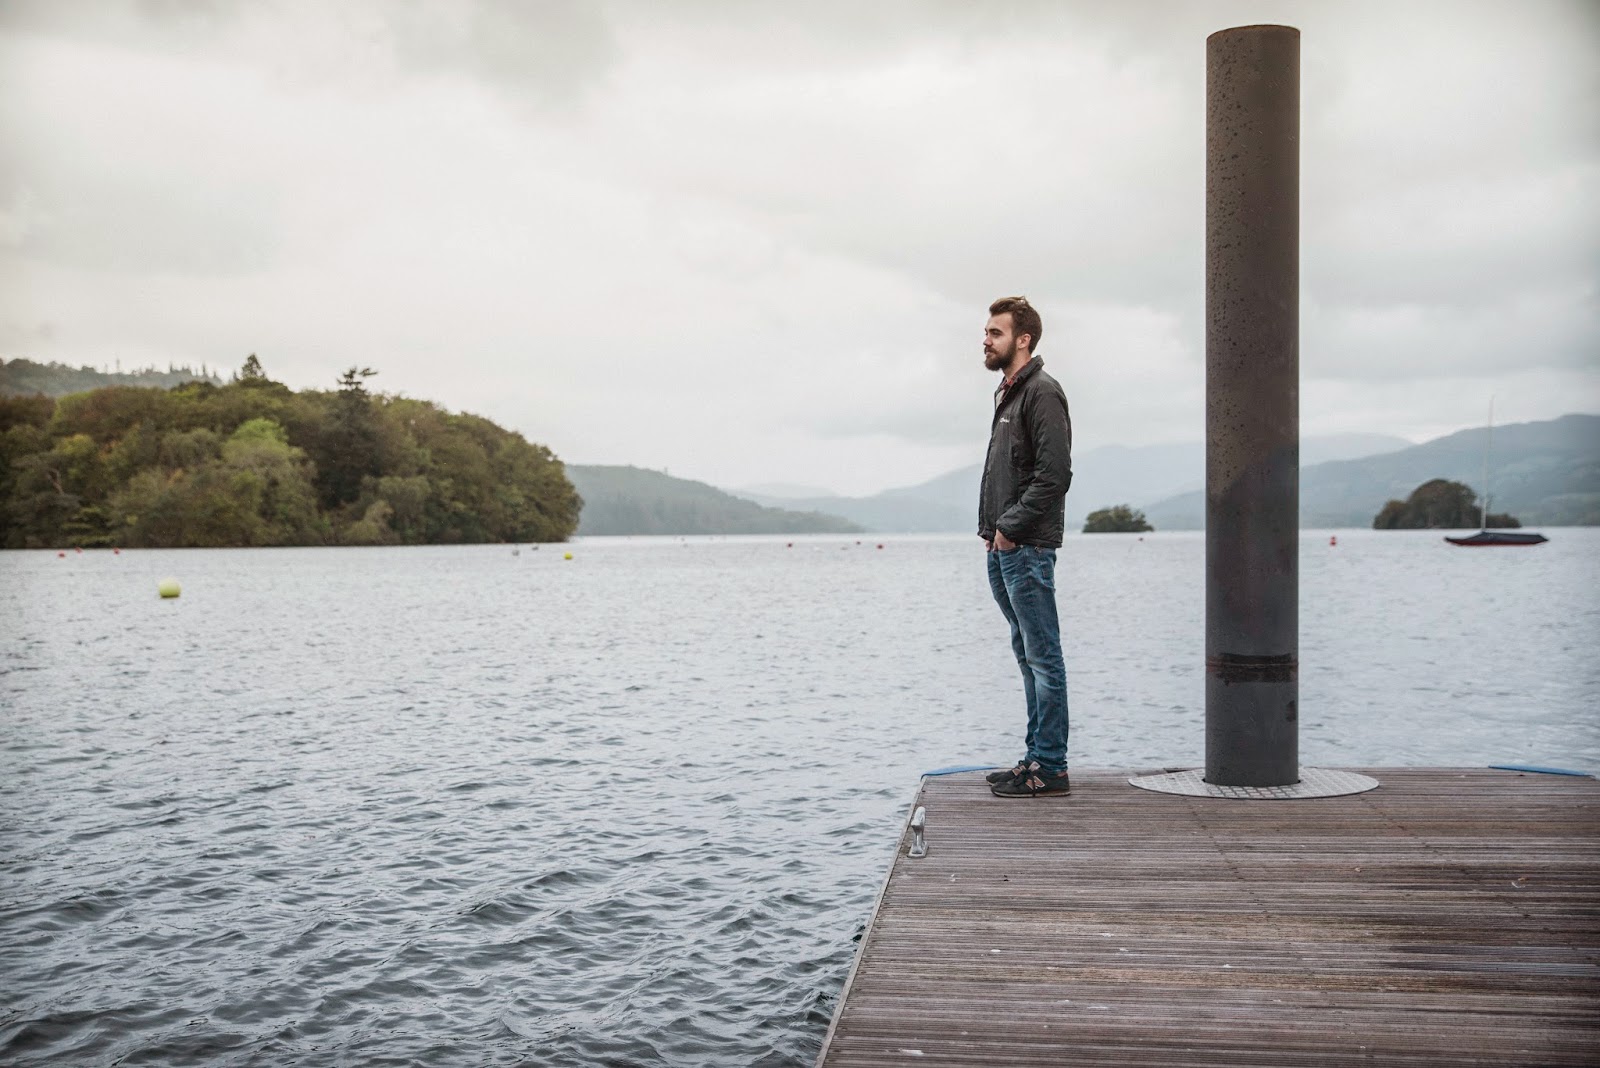


The preset that I used for these Images is onOne Grunge with grain and Dark Edges, I did alter the tones to make them work with the images as well as remove the dark edge. I like the feel of these images but in exporting it has shifted the colours slightly and its not due to the colour profiles. This series has a very editorial feel and look and its a strong way to ensure the Images have a constant look. I will be researching into old film characteristics as this is a powerful tool to add meaning to an image be it to guide the viewer to a feeling or just to emphasise what is already there.
I wanted to edit these images in a way I have not tried before, by using the preset to add to the subject matter, this is a method I have noticed a lot of photographers I follow on photoshop use. A lot of the preset are actually designed to replicate old film styles, this method of editing could be seen as a throw back to how photographer selected film for a shoot just applied after the shoot not before
I wanted to keep the style of my subject while showing off the environment he was in, to do this I started with shooting with a narrow DOF this would lead the eye to the subject emphasising the detail within his beard and clothing. To emphasis this while editing I was looking of a preset to show the most detail with the blacks and shadows. as well as bumping up the clarity.
To show off the environment I wanted the tones to reflect the area and the day, the wasted out tones give its a classic with the dull highlights reflecting the overcast feeling of the day. I also cropped some images to focus on details of the environment, buy removing the subjects face it requires you to look else where in this case you notice the rhythmic waves juxtaposed with the liner wood pier.
The preset that I used for these Images is onOne Grunge with grain and Dark Edges, I did alter the tones to make them work with the images as well as remove the dark edge. I like the feel of these images but in exporting it has shifted the colours slightly and its not due to the colour profiles. This series has a very editorial feel and look and its a strong way to ensure the Images have a constant look. I will be researching into old film characteristics as this is a powerful tool to add meaning to an image be it to guide the viewer to a feeling or just to emphasise what is already there.

Wild camping in the lake district -Blea Tarn Time-lapse
This weekend I went camping in the lake district, getting away form civilisation and distractions allows you to slow down and observe what is happening in front of you. While its a perfect from a photography point of view its important to be prepare for what you are getting in too.
We know the weather wasn't going to be idea although not bad enough to call it off (after all 'bad' weather can give you more character to your images) so we decided to have a relatively short route.

Parking by Thirlmere and walking roughly 2 hours to Blea tarn, this took a bit longer due to the bridal way being resembling a stream, making the rocks slippy an the grass boggy.
Just like a photography shoot, its important to have the right camping gear


I then used photoshops image processor to apply the process to all 562 images, This is a great time saver but you need to design you action to work independently, its also still quite time consuming, it seamed to go fast when i put the monitor to sleep presumably it didn't have to display the processes it was going thought so speed the process up.


The plan
We know the weather wasn't going to be idea although not bad enough to call it off (after all 'bad' weather can give you more character to your images) so we decided to have a relatively short route.
Parking by Thirlmere and walking roughly 2 hours to Blea tarn, this took a bit longer due to the bridal way being resembling a stream, making the rocks slippy an the grass boggy.
The gear
Just like a photography shoot, its important to have the right camping gear
When selecting clothing I like to take layers, a base such as a t-shirt and hoody to keep you warm thought the day then a downs jacket for the night this way you can add and remove layers token comfortable. I have a waterproof jacket for when its wet, I would recommend one with a breathable membrane such as event or gore tex this allow you jacket to let moisture out such as sweat while keeping water out.
A good pair of socks and walking boots help stop blisters and wet feet, agin getting gore tex options helps keep you comfortable.
Accommodation for the night was originally going to be just a sleeping bag and bivi (waterproof cover for the sleeping bag) but due to the harsh weather i took the water proof shell as a bit of extra shelter, i chose to leave the inner fly net and ground sheets to save weight. a sleeping mate is also very important as i found on a previous trip where i didn't have one, with out the insulation of the mat your heat is absorbed to the ground leaving you very cold.
My camera gear now lives in the Dakine sequence bag, this is ideal for me as it has a inner camera block and outer rucksack. This keeps my gear very save when using them together or I can rip the camera block out and my gears nicely packed for the hike.
I would like to get a dry bag for the photo block just to give me piece of mind my gear isn't going to get wet.
For this trip I took all my gear as i know it was going to be a relatively short hike, If i had to carry cooking equipment or extra layer i would consider reducing the equipment.
The outcome
the gear worked out perfect for the trip, which was cold and wet but by taking the shelter it allowed me to keep dry and air things out when thy got wet it also gave me somewhere to keep my gear which would have been very wet had I just used the bivi. The location we planned to camp in was very boggy but we managed to find a dry-ish patch in a wind brake, the only downside being it was on a slope so i found my self slowly sliding out of the tent.
The sky was very dramatic with a thick cloud being swept along with the song winds, this was good for us it gave us a interesting sunset with deep red accents on the clouds and the skies kept opening to show us the stars above.
The photography sunset
Just after setting up camp and getting a brew on I noticed the sunset was catching on the clouds giving a deep red tone to some of the clouds.
I wanted to make this in to a time-lapse the changing of the colour would give it an unique interest, it took me a few minuet to set up the camera. by the time I had set up the camera the colour had gone. The image below was taken 2minuets 40seconds after the first yet all the colours have gone
When I got the image in to Lightroom i batch processed the image, altering the tones and colours, i also removed a fair amount of marks from from dirt on the lens as I hadn't had chance to clean the image. This syncing of the spot removal did not work as it just copies the position of the brush and its reference point on to each image rather than copying the brush and intelligently moving the reference point. This became apparent when I rendered the files on to a time-lapse.
To rectify this I have created a action with in Photoshop to apply to all the JPGs. First i created a selection of all the dusk points and saved it. then i turned on the action recorder and copied the background layer then loaded the selection and applied it to a layer mask. next I applied a dust and noise filter to the copied layer. This smoothed all of the dust particles of and is specfic to each frame as its created form that frame.
I then used photoshops image processor to apply the process to all 562 images, This is a great time saver but you need to design you action to work independently, its also still quite time consuming, it seamed to go fast when i put the monitor to sleep presumably it didn't have to display the processes it was going thought so speed the process up.
once all the files where complete I then loaded them as a sequence in photoshop, this allows you to create the time-lapse with out having to load all the images into the program stopping you using any unnecessary processing power.
The photography night
After the sunset we concentrated on keeping warm and dry having a brew and cooking the sausage tea, I warmed up when we started to think about photography and not how miserable the weather was. the first think i notices was how the clouds where catching the light pollution of Keswick form behind the i wanted to try this as a time-lapse but due to me only taking a 32GB file and half filling it creating the first time-lapse I decided to use the D610s Time-lapse function. This compiles all the images as it goes creating a mov file thats actually smaller that one NEF file.
By shooting in the Timelapse mode I don't have the same quality as with the other method I have used. Because of the tungsten glow hitting the clouds the colour of the stars and space is slightly green, this is something i could alter if i had all the frames.
The final shot we took form the night was of of the tents, I had noticed the stars peaking out behind the clouds so decided to try the classic illuminated tent shot. we places our toruches in the tents and tried to get a even light form both the tents. then we tool the images exposing for the stars.
The image has come out well, The wind was quite fast and i think this has resulted in a softer image, the tents where moving. The stars would have been brighter but the clouds where moving with the wind, we where lucky to get such big gap.
Over all I'm quite happy with the images i got on this trip considering the harsh weather we went in. I will consider going out in such weather again as i think it gives a unique look to the images you just need to be ready for the unexpected.
Subscribe to:
Comments (Atom)
Popular Posts
-
This weekend I went camping in the lake district, getting away form civilisation and distractions allows you to slow down and observe what i...
-
 Hollywood promotional portraits where used to created interest in a actor or actress during the golden age of Hollywood. The characteri...
 -
 My friends play in the local basketball team the Kendal Warriors, While I was up in the Lakes they had a match vs Newcastle Univercity which...
 -
 I was asked to remove the lens flair from this image as they wanted to print it fairly large. so theres a few things to things bout wh...
 -
Birmingham airpot I wanted to replicate the motorway time-lapse with aeroplanes I found this location around 10:30 at night just in ...
-
 A friend of mine is wanting to sell his bike so I took the opportunity to do a product shoot for his internet adverts. As this bike...
 -
I recently had a quick shoot to on the shore of lake Windermere originally the shoot was to demostraight the use of flashguns but the overca...
-
 Flashguns can be a scary bit of kit to get to grips with, but with a little bit of knowledge and practice they can be one of the most...
 -
 With Ryan air offering cheap fairs across Europe it can be cheaper to travel abroad than across the UK. At just £28 for a return flig...
 -
 This was the first stage of the Scottish downhill series as its a 2 day event it was a good chance for me to practice my biking photograp...


Twitter Updates
Meet The Author
Blog Archive
Get In Touch
Category
- Band
- Basketball
- big day
- biking
- Birmingham
- blea tarn
- Boomerang
- Bootlegers
- building
- camp
- Camping
- Collodion. Old school
- composite
- consell hall
- Dallam
- Darkroom
- Editing
- equipment
- Film
- Film characteristics
- grasmere
- Helvellyn
- Hike
- hoop
- kendal
- krisbentham
- lake district
- Lakes
- lens flair
- Library
- marriage
- nikon
- Old library
- Paradise
- Photo
- Photog
- photograph
- photography
- photoshop
- portrait
- preset
- progressive lines
- Public opinion Black and white
- removal
- spinners
- Stars
- Striding edge
- technique
- tent
- the lake district
- the lion and the lamb
- time-lapse
- timeline
- trail
- tripod
- uk
- Vox POP
- Walking
- warriors
- Wedding
- wedding photographer
- wedding photography
- Wet Plate
- wild camp