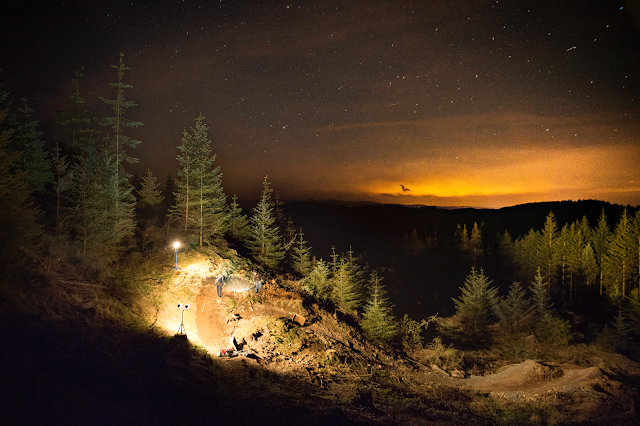
During the night dig I wanted to capture the atmosphere of the dig, working under halogen lighting in the middle of the woods gave a absence and showed the commitment of the progressive liens crew.
I collected a variety of shots altering the exposures to allow me to capture the workers and their halogen lights as well the natural light of the stars.
With a little understanding of how far I can push the exposures in post I chose my exposure to try and keep the quality up. I intentionally selected fast shutter speeds for the the darker shots of the activity to get sharp detailed images. I found the halogen lighting was causing a lens flair that appeared in the sky so in the 4 exposure I block the light with my hand making sure not to cover any of the sky.
I used four of these exposures to make my composite;
- The trees around the track
- The stars and distant trees, I included these trees are the gave the image distance and added interest away form the build
- Is the action shot, While this wasn't the best of all the action shots I had pushed my ISO to 5000 in the other shots so went with this as its at a saver 40000
- I used a small patch of this shot the brighten the gap between the lights in 3 and the trees in.
I had produced a quick test composite after the shoot to see if the images would blend together seamlessly, while this achieve the look I wanted the quality needed to be sorted. The noise in the sky is very strong and the blending of the trees and sky is very noticeable.
As I now knew these pictures would blend together I went back to Lightroom and edited them with the mindset of matching exposures, colours and tones. I reduced the exposure of the stars and applied some noise reduction to give a cleaner image. after opening them in Photoshop I aligned the images Starting with the sky I applied a layer mask brushing in the areas I wanted to keep in the image. I paid close attention to the stars as they moved between exposures I made sure I masked duplicate stars off where 2 images were blending together.
I used adjustment layers to tweak individual layers helping the image appear as a whole.
I achieved a much cleaner image paying attention to the stacking and blending on the image. I decided to lighten the bottom left to lead you in to the image, and kept the colours bold intentionally to aid in the printing as its a fairly dark image.


0 comments